
This simple easy to follow method is proven to get high click through and conversion rates with Clickbank.
There’s a saying that if other people are doing it and they’ve been doing it for a while, it’s profitable and you need to do it too. The fact is that running ads on Bing, Google, PPV or wherever cost money.
If this wasn’t profitable, these ads wouldn’t be running for basically years now. If you’ve done any searches at all for Clickbank products, you’ve no doubt seen ads like these. All the top products have them and in fact they can even be found in Google.
I personally don’t run any in Google as I’ve lost accounts in the past and I don’t want to take a chance but there are others doing it.
The reason they get away with it is that instead of sending someone to your landing page when they click on an ad in either Google adwords or Bing ads and then over the Clickbank sales page, instead every single one of these once you click a link on the landing page…sends you directly to the checkout page for that product on Clickbank.
Because you aren’t “bridging” from your landing page to the Clickbank product sales page but instead are sending them to the checkout page directly from a page you own…that’s how people are getting away with it in Adwords.
Being able to send someone to a Clickbank checkout page has been around for quite a while
and I’ve never had any issues with either Clickbank or a vendor, ever.
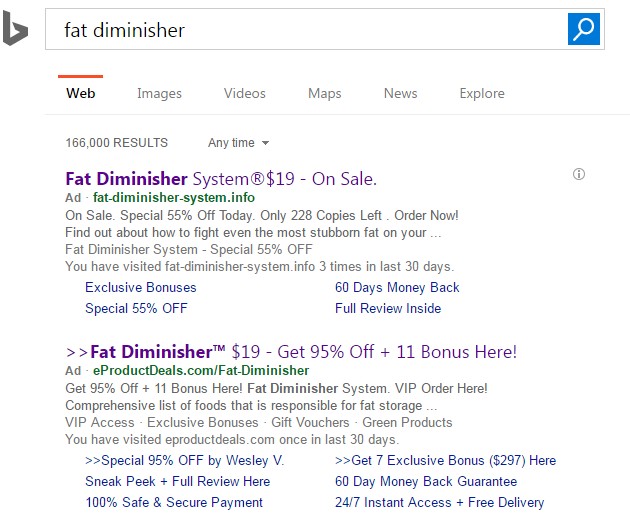
Here’s a screenshot of a search for “fat diminisher” on Bing

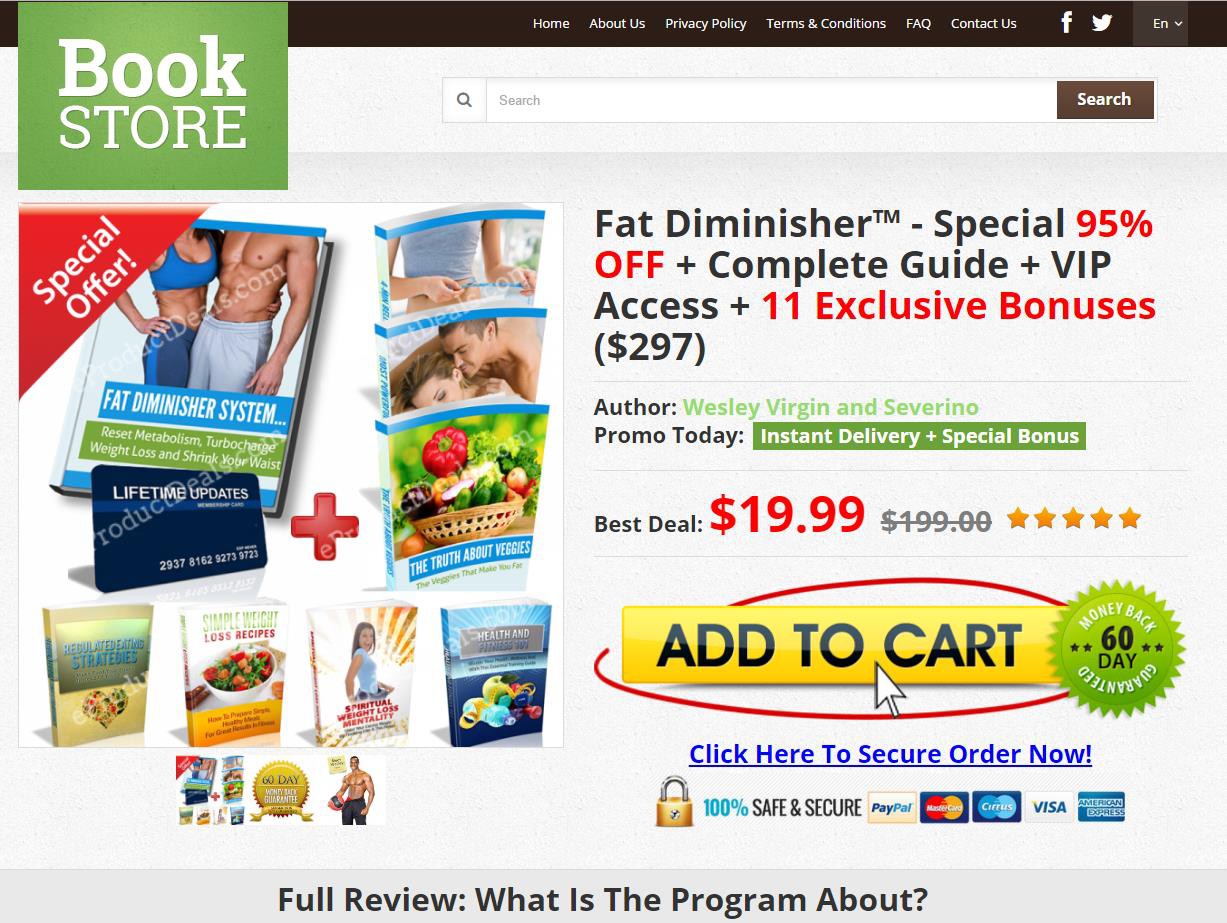
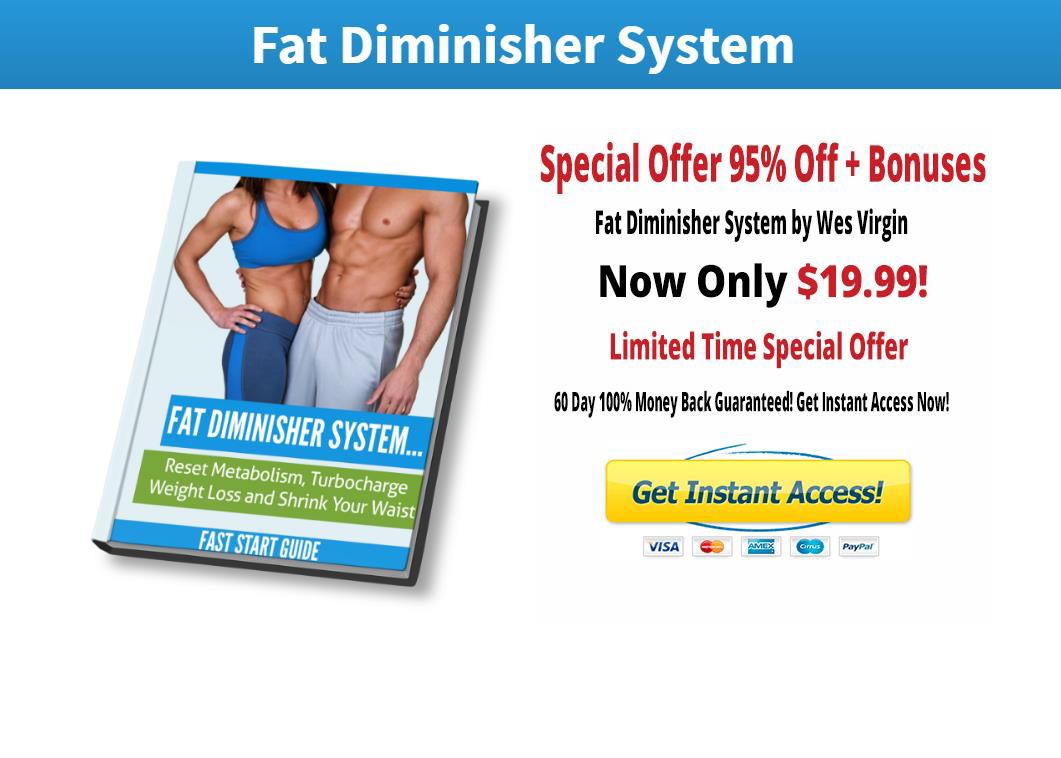
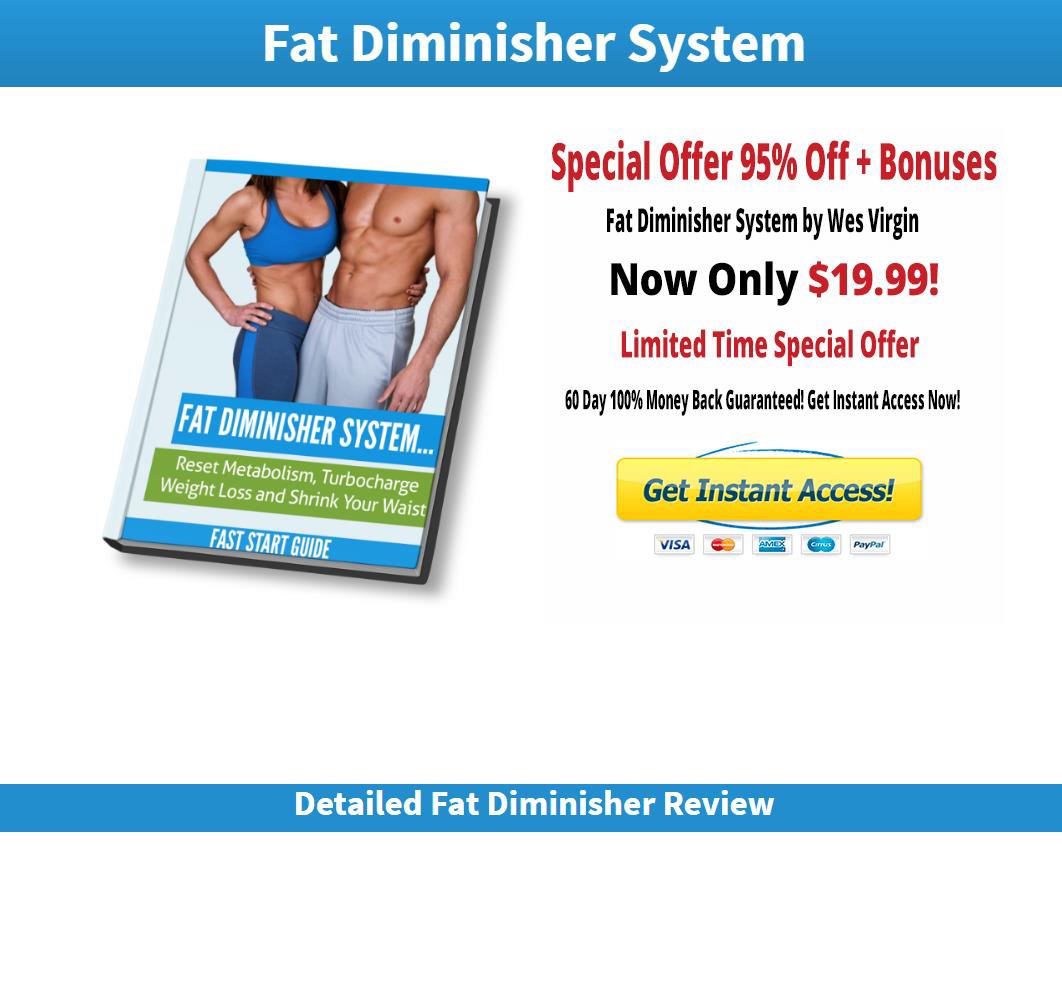
If you click on any of these ads they pull up very similar landing pages like this one. In fact I’d be surprised if you haven’t seen this one as it’s been around for years.
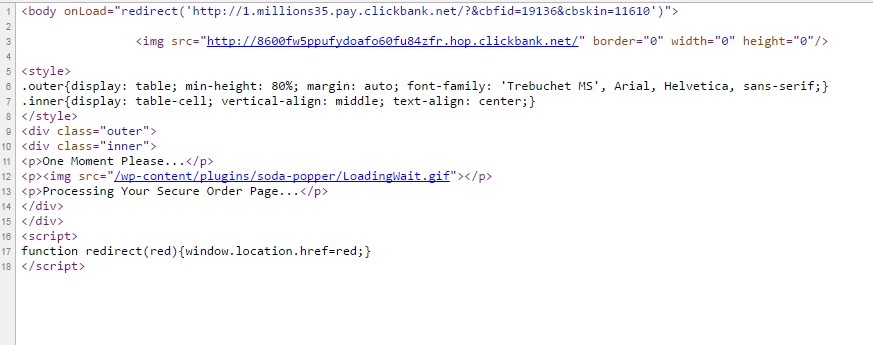
And like I said, if you click on the link it’ll take you to the checkout page…but first it goes here to a page that looks like this:
Then… it goes to the checkout page:
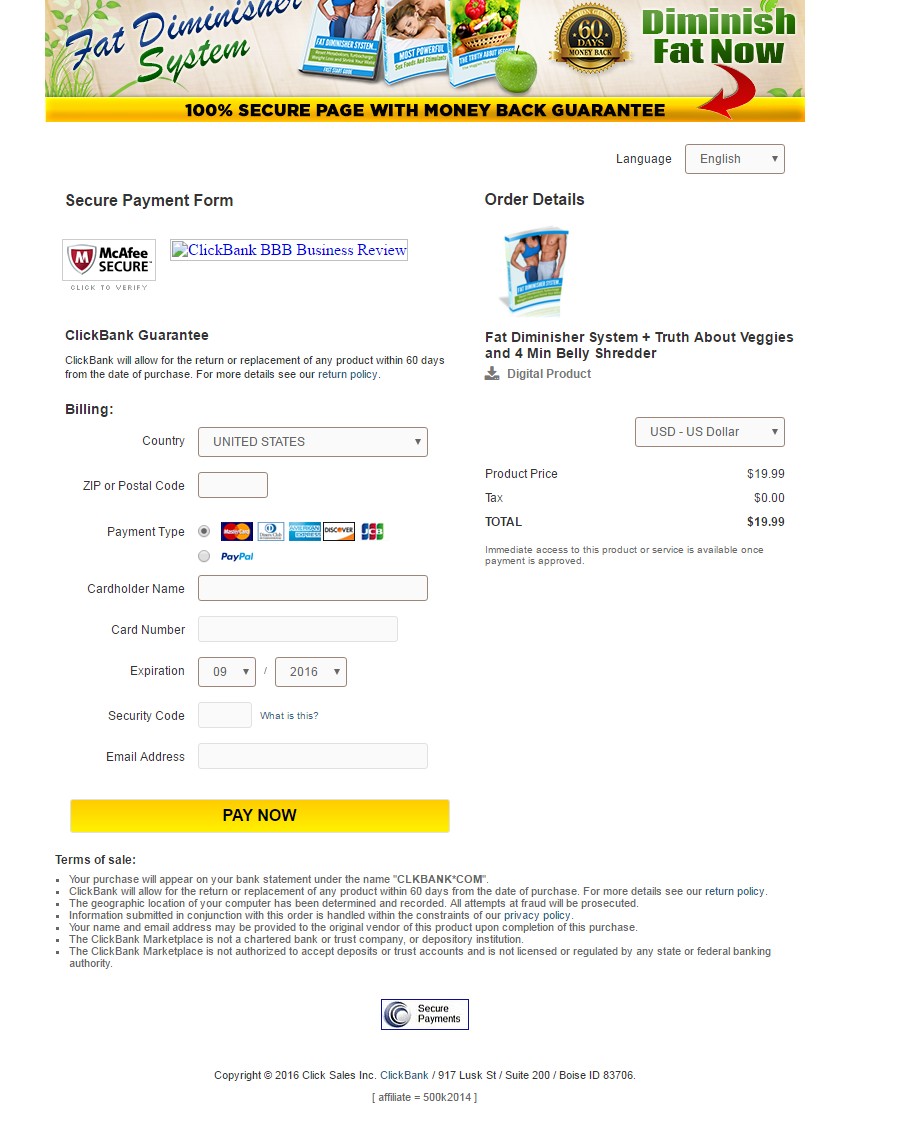
And as you can see the affiliate link is properly registered.
I’m going to show you how to do this in Bing and also which keywords to target to practically guarantee you will make a profit.
BTW I’ve seen this landing page that this affiliate is running for over 3 years now, every single day on Bing and Google.
Must be making money right?
>>Interesting find! (I literally just discovered this right now as I’m writing this and have added it to share with you)
I went to Google to see if these landing pages were there and yes there are. However look at the bottom ad.

This actually looks like it may be a genius way to get traffic to your ads without getting into any trouble with Google as you’re simply sending traffic to Bing.
Google gets TONS more traffic than Bing does even though you can do quite well with Bing, Google frankly is the King Kong of PPC traffic however they are notoriously strict with what you can run.
If your ad is the top ad in Bing, it’s going to get usually 50% or better of the clicks, sometimes as high as 70%.
I haven’t tried this but I don’t really see why it wouldn’t work to drive massive amounts of traffic over to your ad on Bing as long as you have the top spot.
Stay tuned
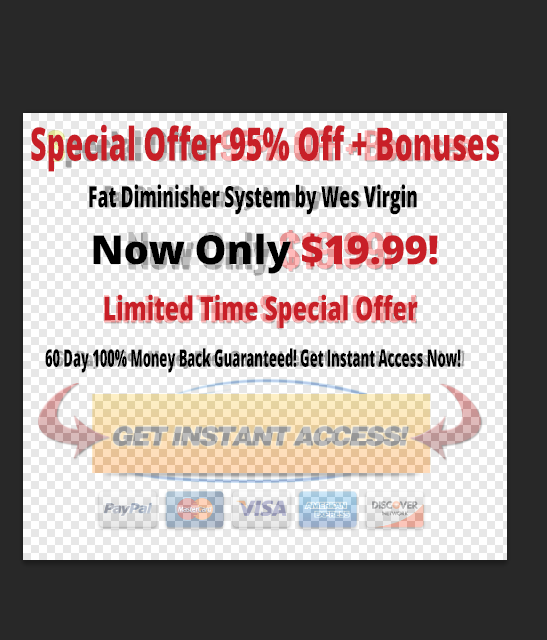
Here are some more examples of the landing pages that are commonly used with this method.
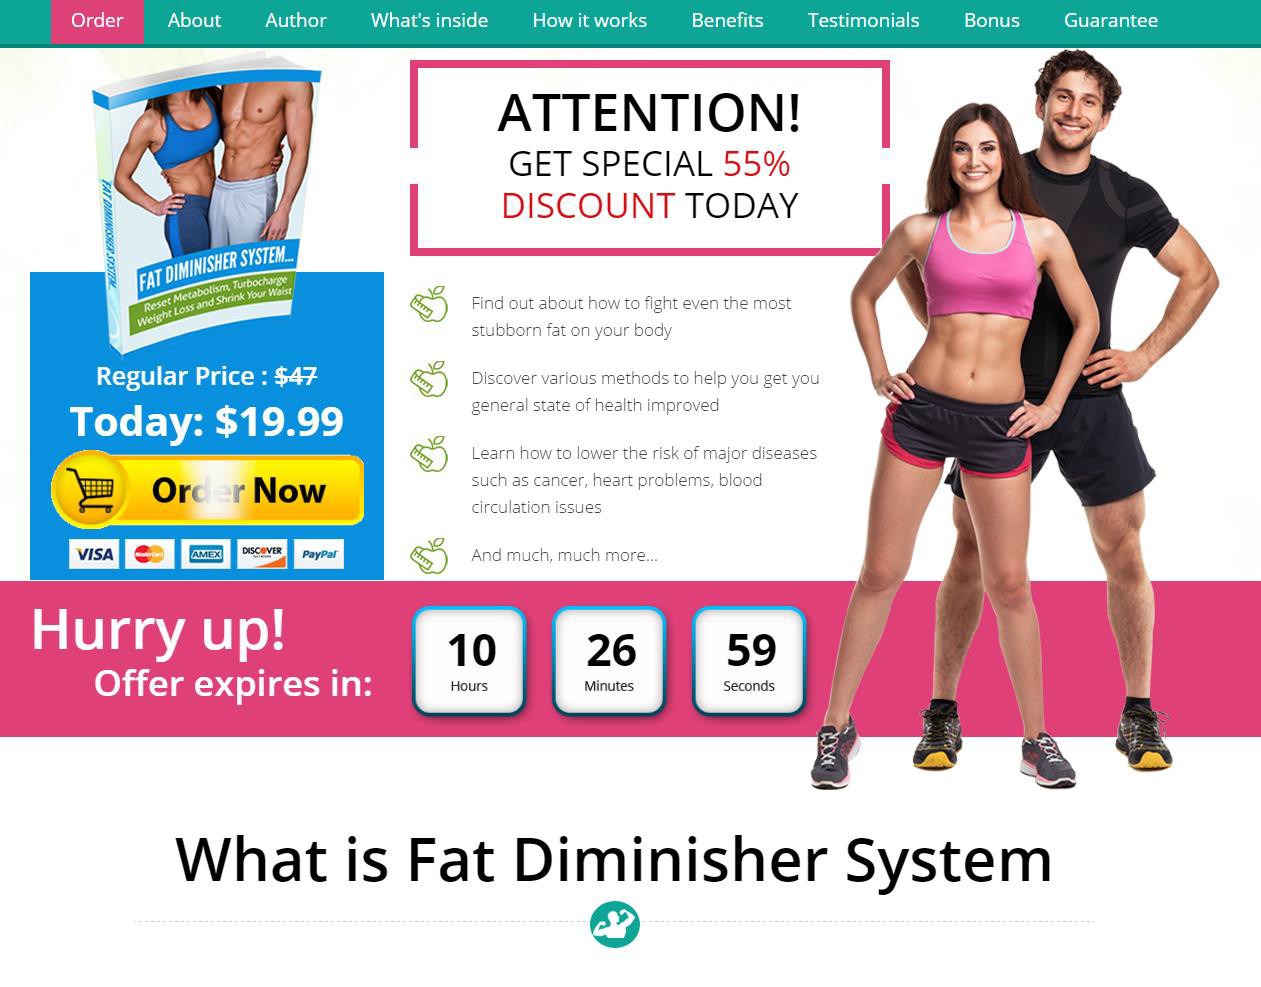
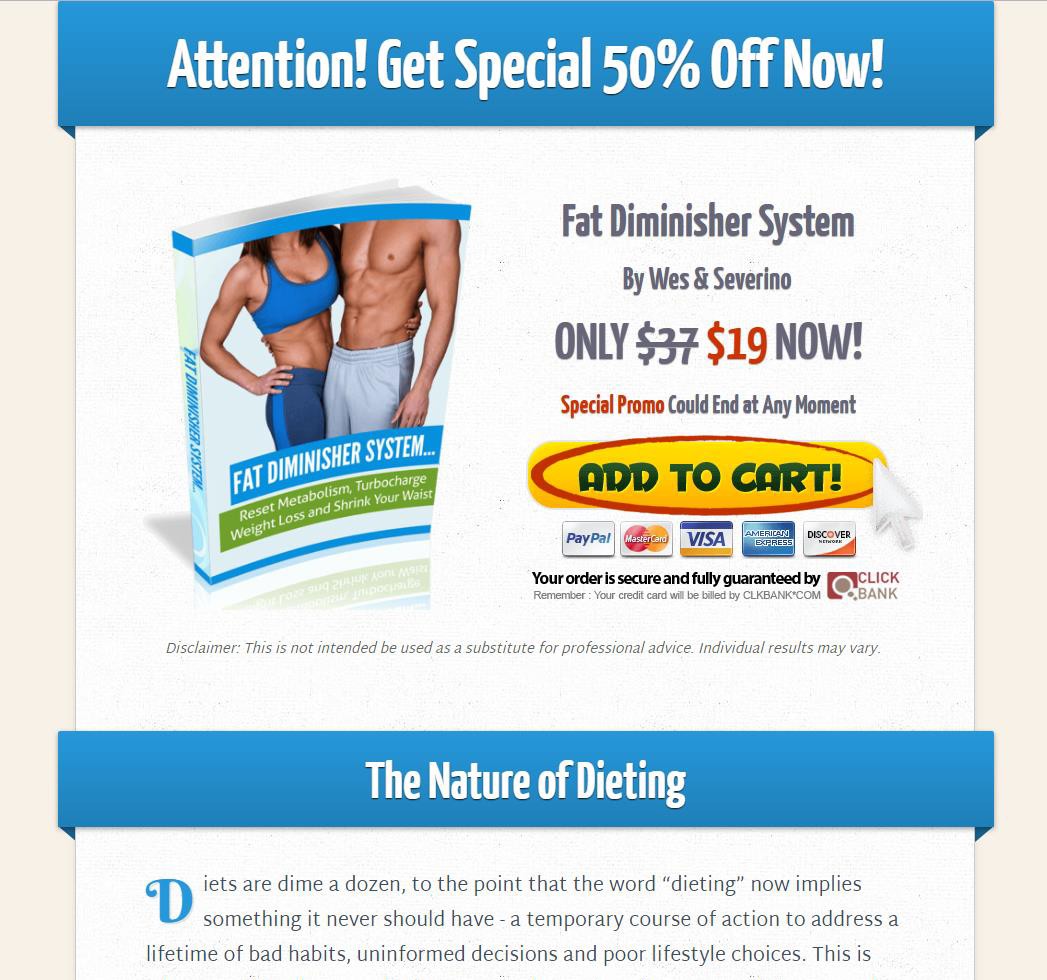
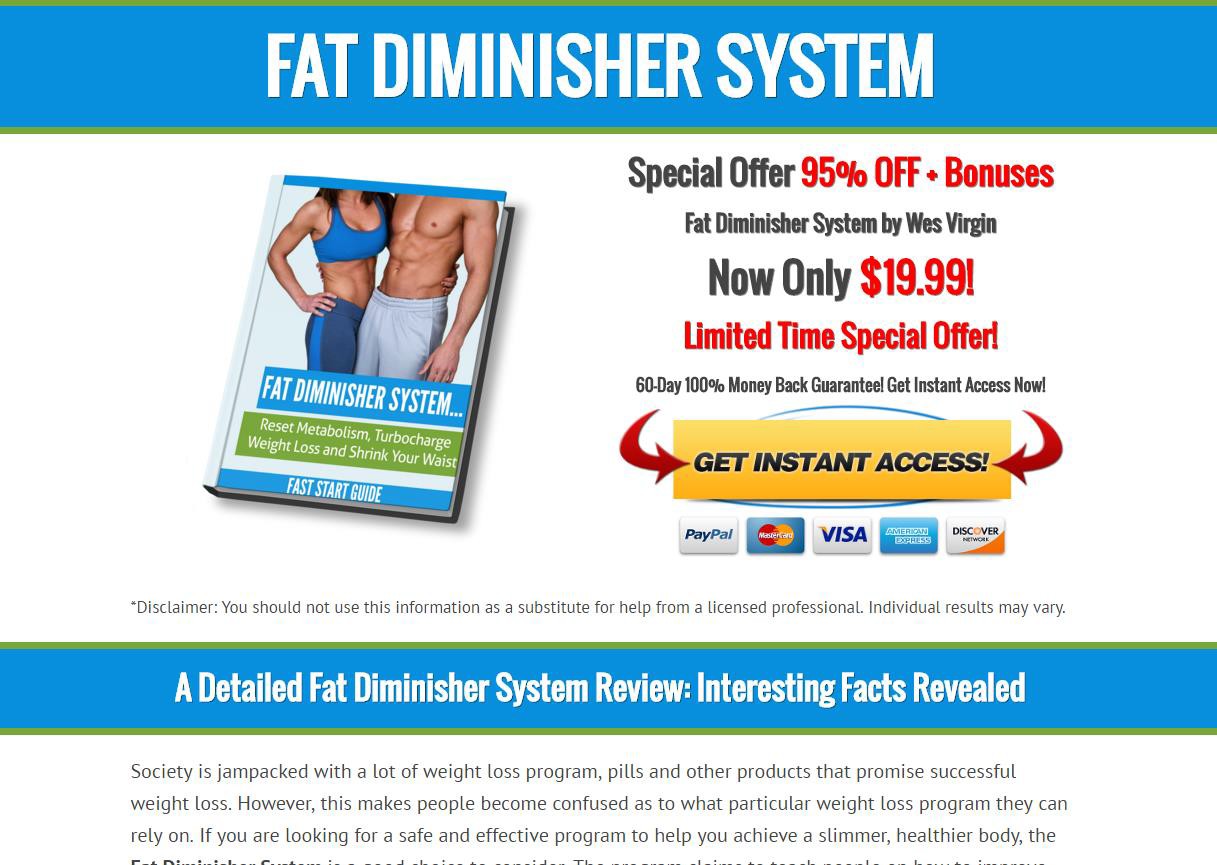
They all have the name of the product as a headline, the BIG OFFER which is a made up large discount, a picture of the product and a Call to Action button.
It’s super easy to make these. You can make them either in WordPress, I used OptimizePress
2.0 to build some for myself. Or you can use an HTML template and just drop in the images and text.
The beauty of using an HTML template which is what I ended up doing when I scaled this up to over 300 products, is that once you have the template and you’ve made one, you can use find/replace to drastically speed up the process.
Like in the one above, you’d find/replace any mention of the text FAT DIMINISHER and Fat Diminsher with another product like DIABETES DESTROYER and Diabetes Destroyer. Then you swap out the image, change the price on your Call to Action button template and find replace the appropriate text that’s related to the product.
I’m going to do this using Optimzepress 2.0 but you can use whatever theme you want if you decide to make your landing pages this way. In Optimizepress choose create new page
I used the “simple landing page” template
Change the headline to the product name + system
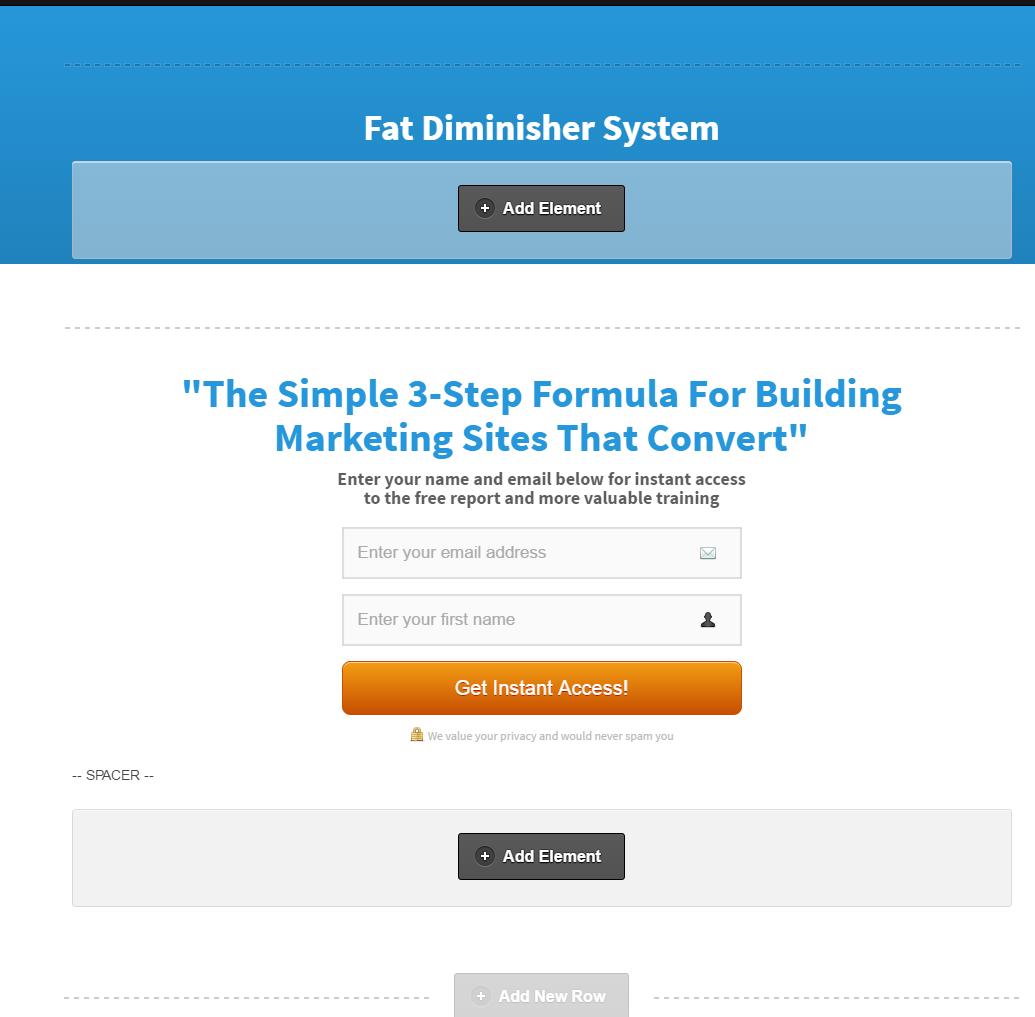
Add new row > 2 columns
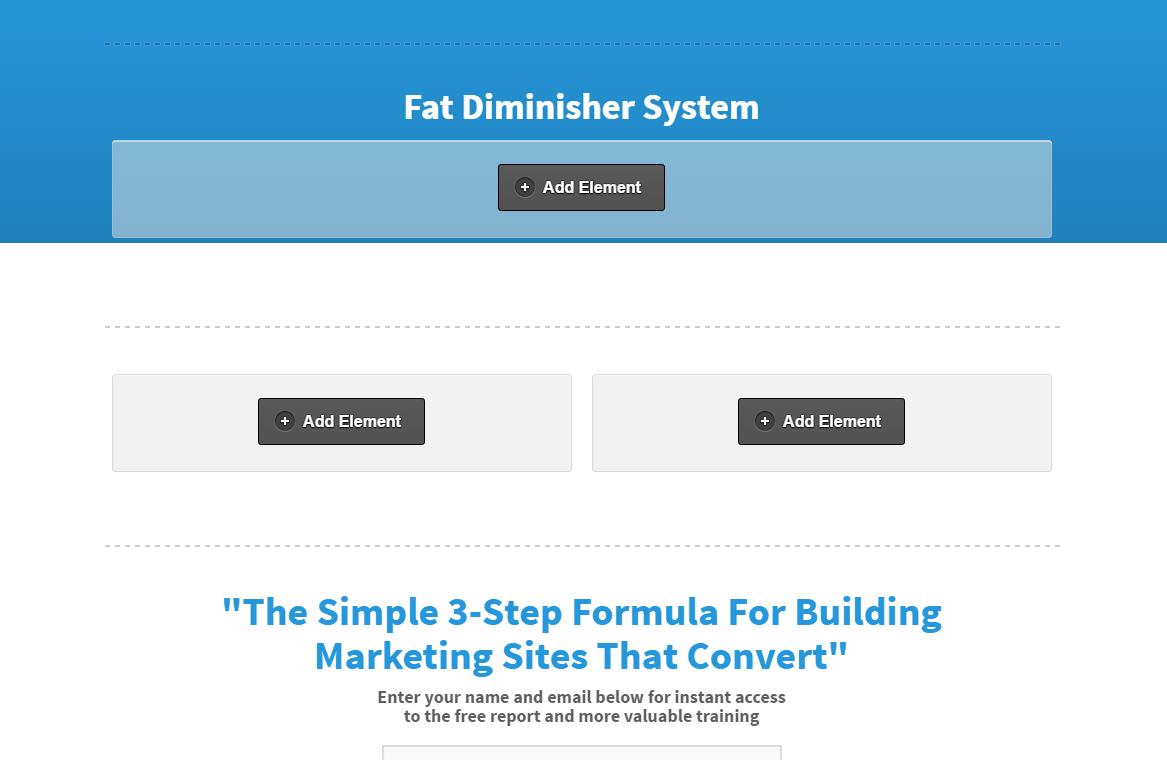
We need a picture of the product so we’ll first look on the actual product website (if you don’t find one there, look in Google images)
In the left column choose add element > images and upload the product image and choose the medium size if it’s larger.
We now need a call to action button so we have to make one.
If you don’t have Photoshop, it’s only $10 a month for Photoshop CC. If you don’t feel like doing this part yourself, just get one made on Fiverr. Make sure you tell you need the .PSD file too. You’ll use this to make buttons for other products.
One of my most used tools and it’s free is Jing. It is an awesome screen capture program which you just drag around what you want and it takes a picture of it.
Download and install Jing. Now take a screen capture of one of the call to action buttons from the Landing pages that are advertising in Bing or Google for a Clickbank product.
Here’s how I do it in Photoshop
Open the image you just grabbed
Set the opacity to 50%
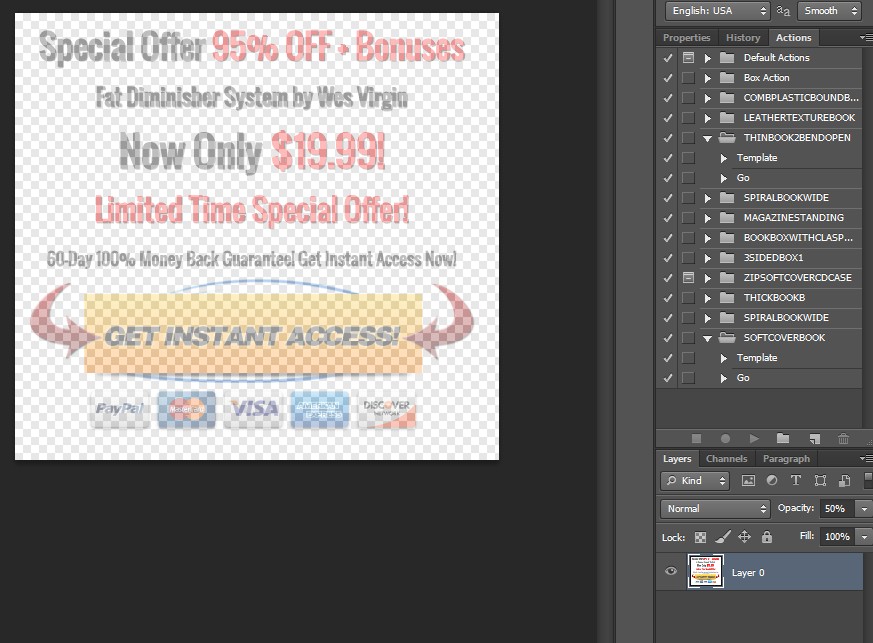
Now just use this as a template to make your own.
New layer > text > I chose Open Sans font and just typed it out and then click control-T and resized it to fit like I wanted it to. Hold the shift key down to constrain it as you resize it.
Change the colors (If someone else is having success, it’s a good place to start so I’m going to use the same colors they are.
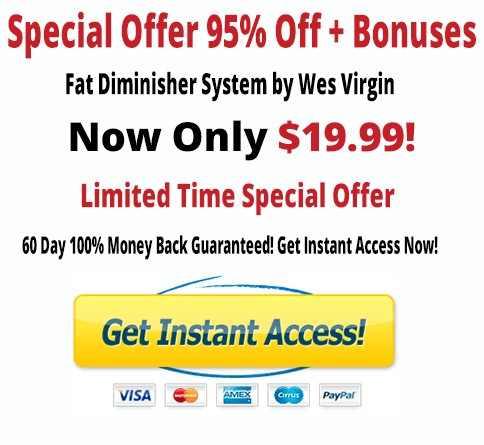
Now I just need a call to action button with credit cards underneath so over to Google Images I ended up having to search for “instant access button with credit cards” to find a good one. Drag it into the call to action template we’re making and resize to fit.
Uncheck the “eye” icon (first photoshop image above, lower right) next to the original image layer that we set to 50% opacity and we have our button!
Place this in the right hand column of our landing page template
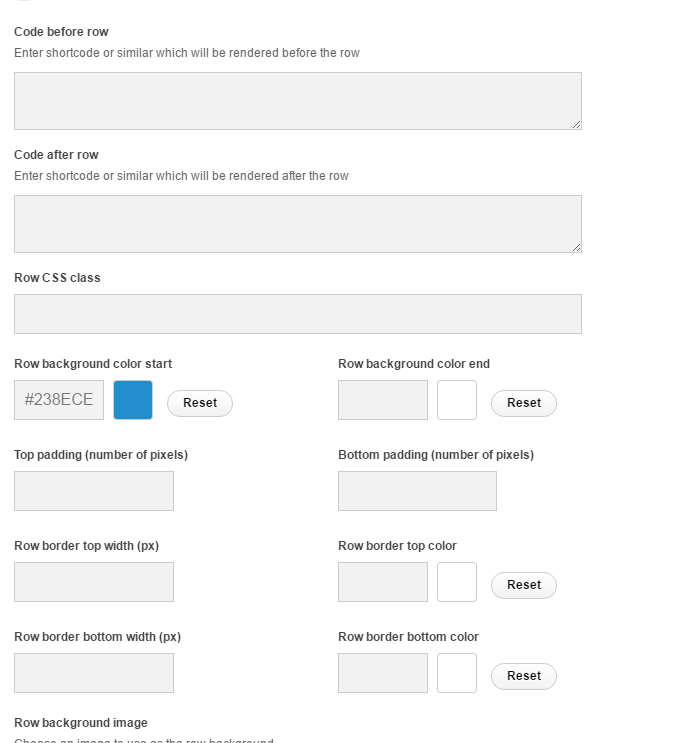
Add new row beneath this and set the background color to match the one behind the headline by clicking the edit icon which is the pencil.
To get the exact color I used a chrome extension called color picker which allows you to click on a color and it will save the color code to your clipboard. Then you just paste in the code number to get the right color.
Insert your review text and just repeat the process down the page till you have it filled out.
Now to make this into an html template which I highly suggest you do, (I’ll explain why in a second) use another Chrome extension called Full Page Screen Capture. It’ll take a full page screen capture of your finished page.
Now head over to Fiverr and do a search for .PSD to HTML
So here’s why you should use an HTML page instead of WordPress.
Besides the fact that it’s way more secure, when you go to make multiple landing pages for all the different top clickbank products, instead of making each one one by one. You can just use find/replace to edit 90% of the stuff on the page.
The only thing that you can’t do that to is the review text. But…even then you can write it in
such a way that for a lot of it you actually can use find/replace.
You could also in WordPress use the option clone page to make a second one and use a find/replace plugin as well. This is only an option though if you don’t plan on tracking keywords and only want to use the most basic ones.
If you want to scale these campaigns out with multiple keywords you’ll need to use Prosper202 the free tracking program. In order to have it track your keywords all the way through to a conversion on Clickbank you’ll need to use an HTML page. That’s the main reason I use HTML, it’s much easier to set up tracking that works all the way through the sales process.
Getting it to work in WordPress is beyond the scope of this guide.
Jump page
This is the page that I showed you earlier that your click goes to before hitting the checkout
page. It’s what you’ll link to from your product image and call to action buttons.

The reason you need a jump page like this is that you need it to set the affiliate cookie so that you get credited with the sale.
Here are some detailed instructions on how to go about this if you need further information:
http://www.cbgraph.com/articles/how-to-send-your-visitors-directly-to-the-clickbank-order- page.html
In the article they state not to use the image method. I’ve found it not to be a problem and is the one I use and the one almost every other person doing this uses.
Because you are only dropping an affiliate cookie on people who have actually clicked on a “buy now” button and not trying to cookie every single person that visits your site, Clickbank appears to be ok with this and in fact there is a reference to it on their site.
http://www.clickbank.com/tech-tuesday-redirect-affiliate-traffic-to-multiple-unique-landing- pages/
You don’t need the software mentioned in that article you just need to set your page up like I’m going to show you.
I’ve included a jump page in the download for you to edit and make your own.
Step 1. In the head section is this code:
<meta http-equiv=”refresh” content=”2;url=http://1.millions35.pay.clickbank.net/?vtid=19exit&cbskin=12394&cbfid=22620 ” />
The bold section is the link to the checkout page. This a meta refresh which means that when this page loads it will refresh and send the visitor to whatever URL is specified. In this case it’s the Clickbank products checkout page.
To get this link just go to the actual product page which in this case is for Fat Diminisher. Right click the buy now button and select “copy link address” and paste it into the bolded area.
http://1.millions35.pay.clickbank.net/?vtid=19exit&cbskin=12394&cbfid=22620
Now you need to set your affiliate cookie. Get your Clickbank link from either Clickbank’s marketplace or the vendors affiliate page and paste it in this bolded area:
<img src=”http://4e2acjn6c1yqcv48uhrc2j5vh8.hop.clickbank.net/?tid=BING” width=”1″ height=”1″ />
Notice that I included ?tid=BING, that way when there is a conversion I’ll know it came from Bing.
In the premium video version of this course where I take a campaign from scratch to live, I
show you how to use lots of keywords and how to setup the tracking with Prosper202 so that it works with the jump page and tracks your conversions inside Prosper. Applicable only if you want to scale up and go with lots of keywords.
Here’s the link to the premium video walkthrough version in case you missed it. Click Here
That’s all you have to do. Upload this to your server and link to it from your landing page’s call to action button. The jump page will do the rest.
Keywords
The absolute most profitable keywords of all are the actual product name and website URL itself for practically any product sold online.
People learn about products from all sorts of places and in the case of Clickbank products, it’s usually from seeing a banner ad or receiving an email or reading a blog post somewhere.
When they are ready to buy there is only one place to go and that’s the products website. Obviously not all people who type in the name of a product are doing so in order to buy it but enough are.
I discovered this a long time ago and it still holds true. The actual product name of any product, it’s model number or the website URL are absolutely the most profitable, highest converting keywords for any product.
It’s so much the case that if you go to somewhere like Commission Junction most merchants don’t allow you to bid on those keywords.
With Clickbank though, I’ve never seen a vendor that cared one way or the other. A sale is a sale and that’s all they really care about, at least from what I’ve experienced.
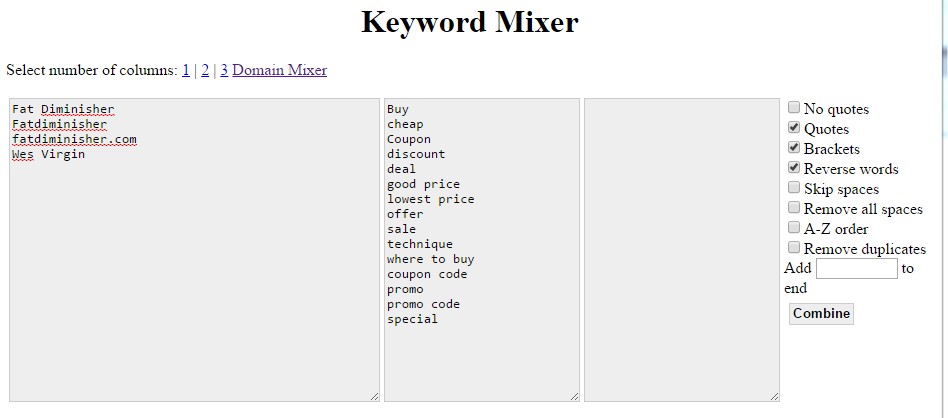
So putting together a campaign for Fat Diminisher the keyword list would look like this: Fat Diminisher Fatdiminisher fatdiminisher.com
Wes Virgin (the creator of the product)
That will be our basic keyword list.
Now to expand it, we need to add some buyer keyword modifiers
Buy cheap Coupon discount deal good price lowest price offer sale technique where to buy coupon code, promo, promo code, special
To make your list of keywords, use this free tool called http://www.keywordmixer.com/
Put your base keywords in the first column. Your modifiers in the second and then click submit.
In the next section on Bing ad setup I’ll show you which selections to use.
Bing Ads Campaign Setup Walkthrough
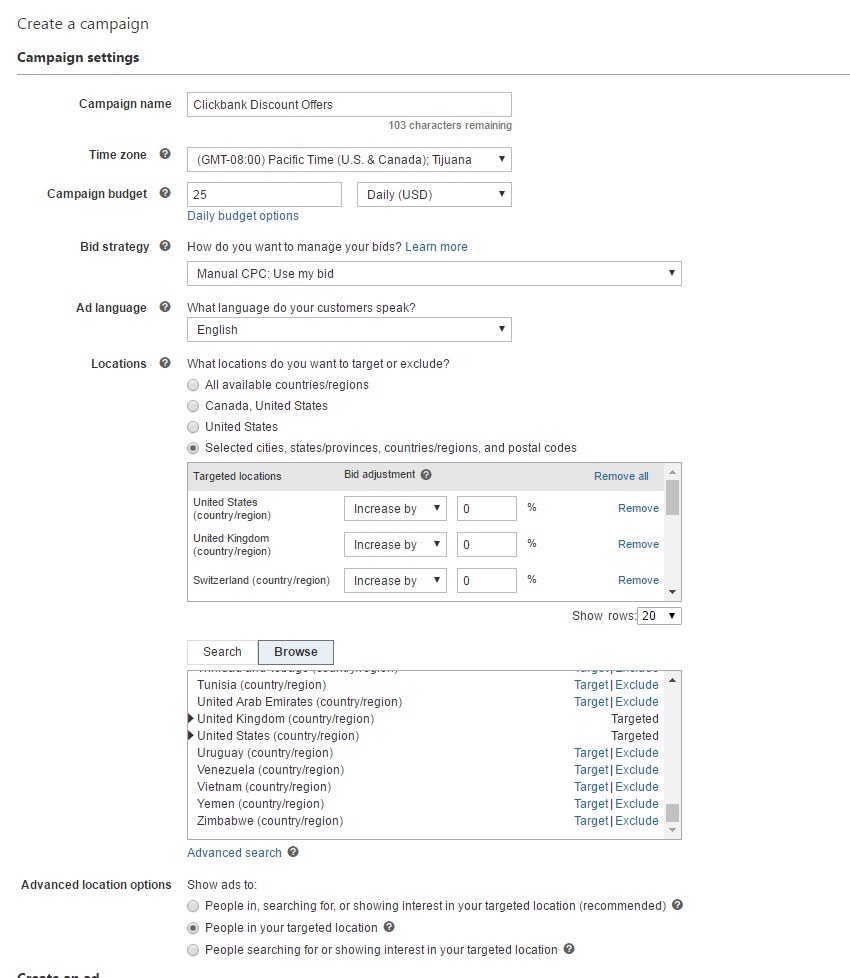
1. Create campaign > search and content campaign
2. Campaign settings ( for countries I’ve selected all English speaking countries US, UK, Switzerland, Sweden, Norway, New Zealand, Netherlands, Germany, Denmark, Canada, Australia. (Some of these aren’t native English speakers but most residents do speak it as a second language)
3. Create an Ad Lookup the product in Bing and find the top 2 ads. Model yours after theirs. Notice that the use numbers and symbols throughout. These are proven to increase clicks on your ads. Also since your landing page is all about a BIG discount, you want your ad to match up with your landing page.
Using the above ads as a guide I came up with the following:
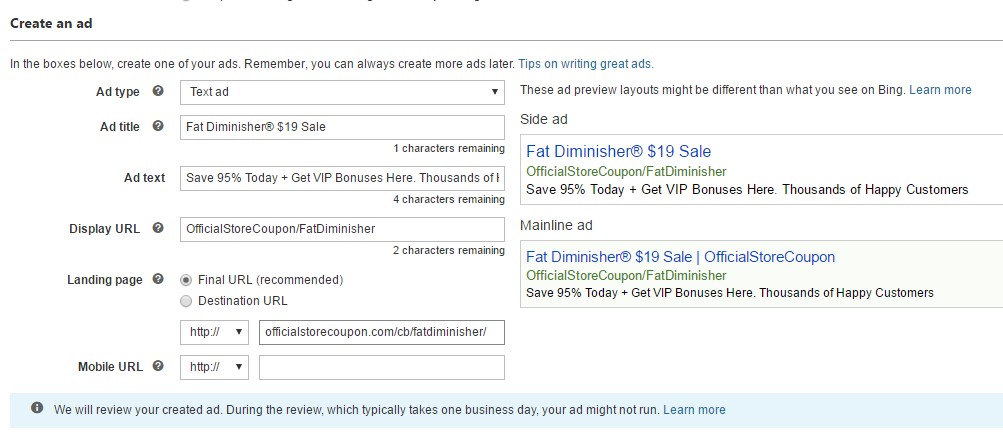
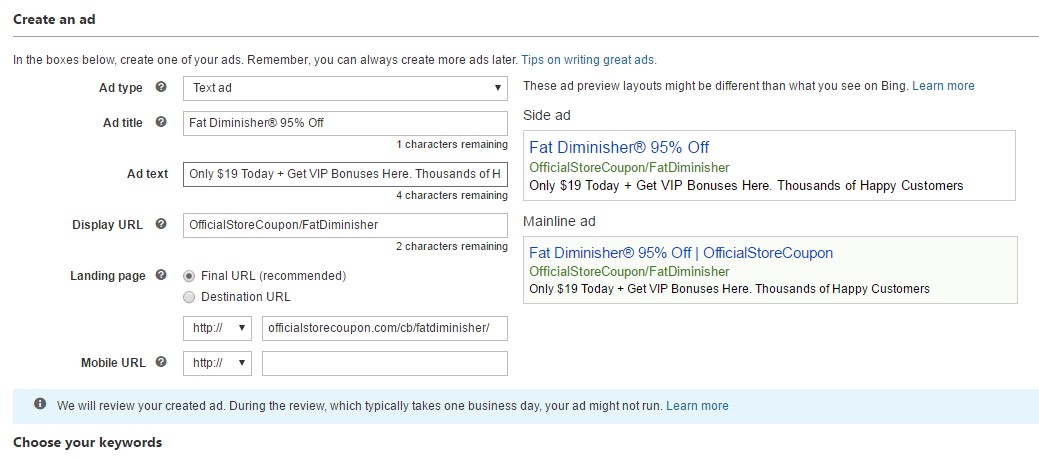
Now make another ad, changing mainly the headline as a starting point. ALWAYS split test your ads!
4. Enter your keywords The keywords are going to be a combination of the product name variations, URL of the product and buyer keyword modifiers. I only use phrase and exact match. Go to http://www.keywordmixer.com/ and enter the product name keywords in the first column and the modifiers in the second and check quotes, brackets and reverse words then click combine.
5. Copy/paste all the keywords generated into the left column and click add, then save.
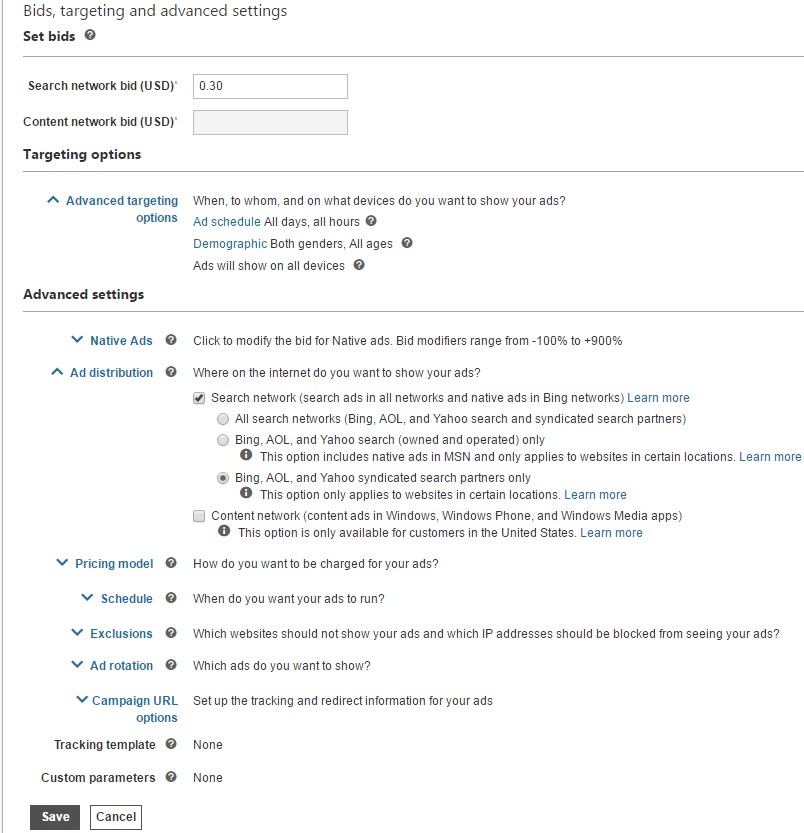
6. Leave the default search and network bids the same. In advanced settings click ad distribution. Uncheck content network and change all search networks to Bing, AOL and Yahoo only and click save at the bottom.
7. Go back to campaigns and click the one you just made then click on the ad group, this will bring up the keywords we just entered. Select all by selecting the top check box. Click on edit > change current bids and set it to $1.00. This is a good starting point as product name keywords tend to be higher priced. The daily spend is limited to $25 so you won’t get wiped out if something goes wrong. Probably the opposite will happen and you may have to raise your bids on some of them. Click save
8. Wait at least 3 days for your ads to start showing up and getting impressions.
9. After a week or so you should start seeing quality score information for your keywords.
Delete any that are below 5.
That’s all there really is to it. Make your landing pages for each of the top products in Clickbank, run ads on Bing to them using the product name and URL as your keywords and then send them to the Clickbank checkout page.
It really does work that easy and the proof other than me saying so is that others have and are doing this exact same thing.
Of course the obvious question is “what about all that competition?”
Yes there is that…on the top, top products but as you go down the list, you’ll find there is little to no competition at all.
In fact you can sign up for Clickbank alerts for new products, relisted products etc… on
Clickbankengine.com. The alerts look like this and you can click on each.
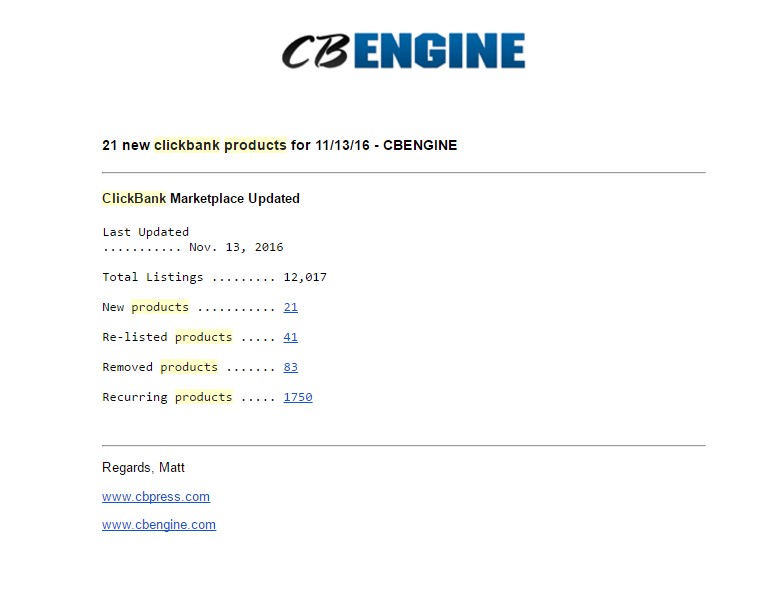
This way it’s easy to stay ahead of any competition and grab the low hanging fruit before anyone else does.
If you don’t want to mess around with getting your own landing page template made,
I’m selling the exact one I use along with the exact “jump script page” that I use.
They are html but are very easy to edit with an html editor, I use Dreamweaver, and you can bang them out once you get the hang of it in about 10 to 15 minutes tops.
I personally made about 300 of them banging them out all day long for a couple weeks. Kind of sucks while you’re doing that mindless work but once they are done, they’re done and you can just throw up the campaigns.
Alternatively take a look below on TOP Earning Methods from BuySellMethods.com certified sellers.Learn how to make money online easily with no risk, get fast support and mentoring.